HTTPS with Nginx using a Private Certificate Authority
Objective
Secure an existing Nginx website using HTTPS and a certificate signed by a private Certificate Authority.
Environment
- Virtualization: VirtualBox
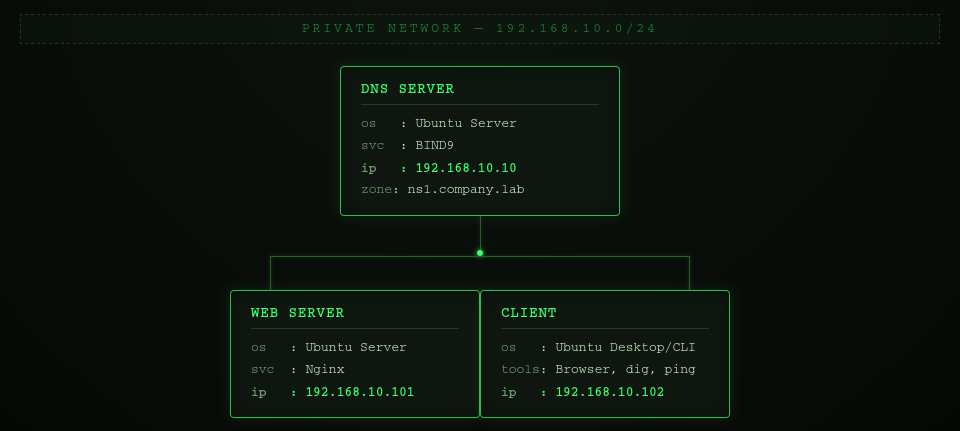
- OS: ( 1 DNS Server VM + 1 Web Server VM + 1 Client VM)
Network Topology
Prerequisites
This lab builds upon the Private DNS Infrastructure with BIND9. The following components are assumed to already be configured:
- BIND9 installed and running on the DNS server.
- The company.lab DNS zone created and configured.
- The zone file (/etc/bind/db.company.lab) already exists.
- The client is configured to use the internal DNS server (192.168.10.10) via Netplan.
- DNS resolution between the client and the DNS server has been verified.
Phase 1 - Verify DNS Resolution
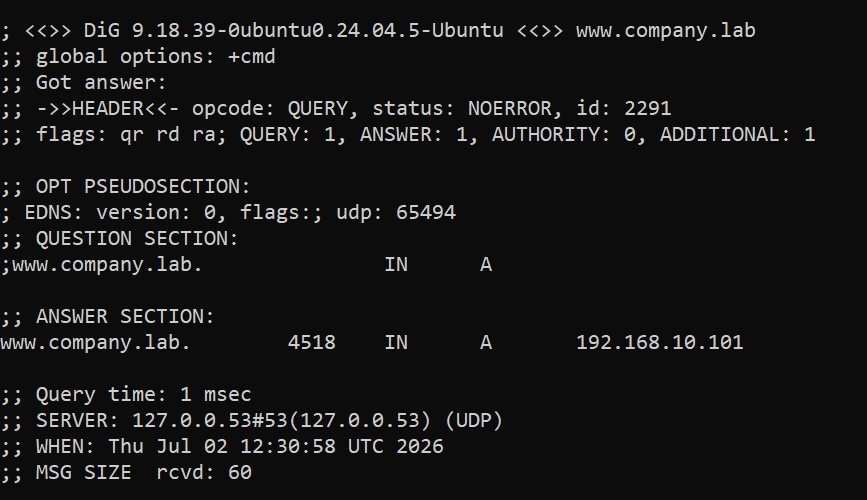
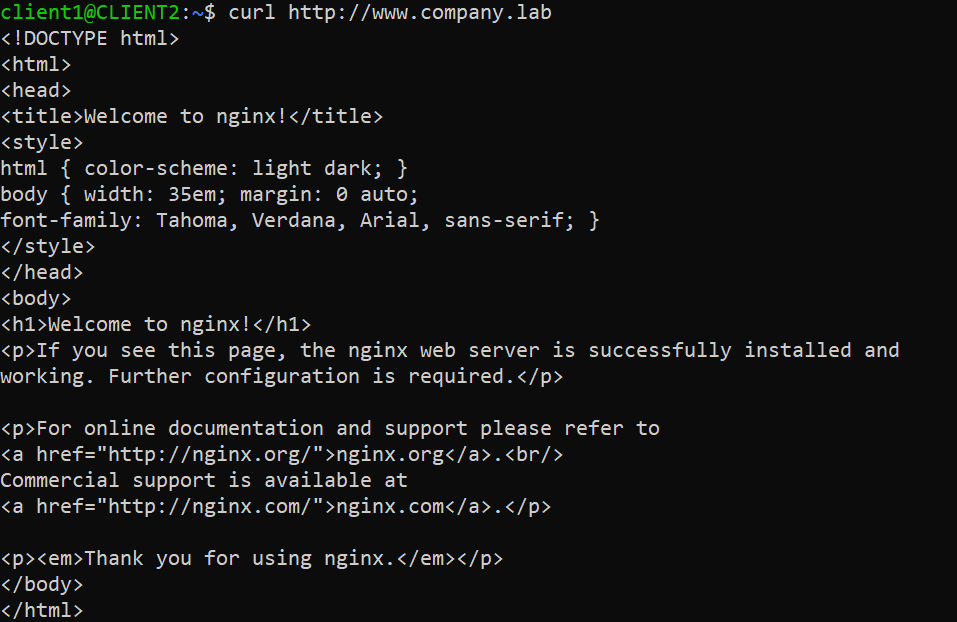
Before enabling HTTPS, verify that DNS resolves the web server correctly.
On the client:
dig www.company.lab
curl http://www.company.lab
Phase 2 - Create Certificate Authority
Step 1 - Create a directory
mkdir ~/ca
cd ~/ca
Step 2 - Generate CA private key
openssl genrsa -out ca.key 4096

Step 3 - Create CA certificate
sudo openssl req -x509 -new -nodes \
-key ca.key \
-sha256 \
-days 3650 \
-out ca.crt

Phase 3 - Create the Web Server Private Key
On the webserver:
Step 1 - Create a directory
sudo mkdir -p /etc/nginx/ssl
cd /etc/nginx/ssl
Step 2 - Generate the server’s private key
sudo openssl genrsa \
-out www.company.lab.key \
2048

Phase 4 - Create Certificate Signing Request (CSR)
On the webserver:
Step 1 - Generate the CSR
sudo openssl req -new \
-key /etc/nginx/ssl/www.company.lab.key \
-out /etc/nginx/ssl/www.company.lab.csr
NOTE: For the fields, we use values similar to the CA, but make the Common Name exactly (www.company.lab)

Phase 5 - Sign the CSR
Step 1 - Copy the CSR to the Certificate Authority
On the webserver:
scp /etc/nginx/ssl/www.company.lab.csr samurai@192.168.10.10:~/ca
Step 2 - Sign in on the CA
On the DNS server:
cd ~/ca

sudo openssl x509 \
-in ~/ca/www.company.lab.csr \
-CA ca.crt \
-CAkey ca.key \
-CAcreateserial \
-out www.company.lab.crt \
-days 365 \
-sha256

Phase 6 - Deploy the Certificate
Step 1 - Copy the signed certificate back to the webserver
scp ~/ca/www.company.lab.crt web-srv@192.168.10.101:/tmp/
Step 2 - On the webserver
sudo mv /tmp/www.company.lab.crt /etc/nginx/ssl/

Phase 7 - Configure Nginx
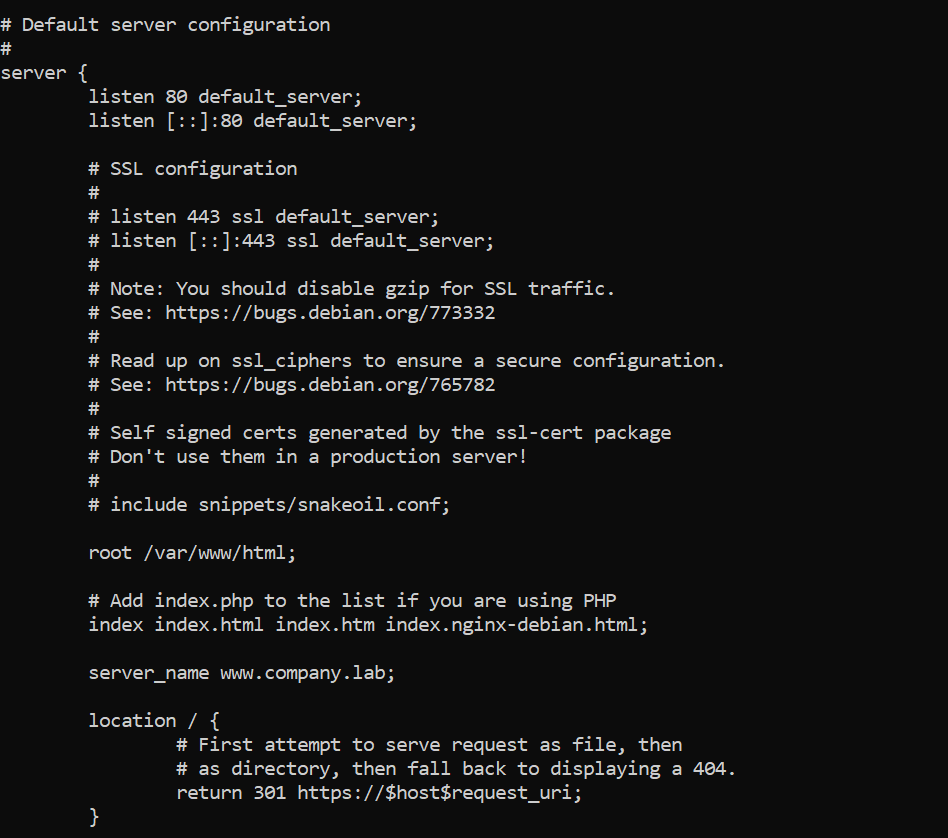
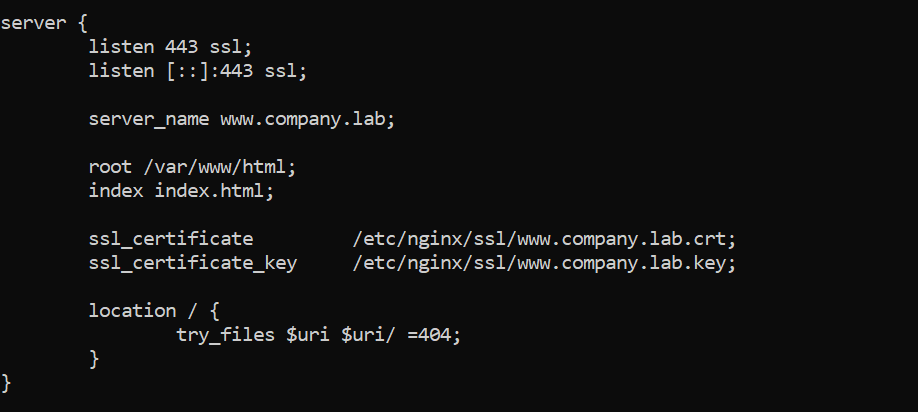
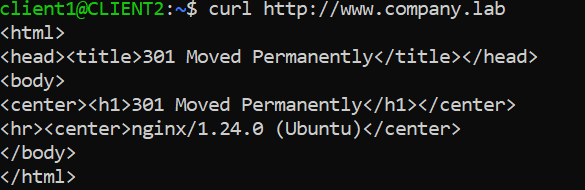
Step 1 - Configure Nginx to redirect HTTP traffic to HTTPS and use the signed certificate.
sudo nginx -t
sudo systemctl reload nginx
Phase 8 - Test HTTPS
On client:
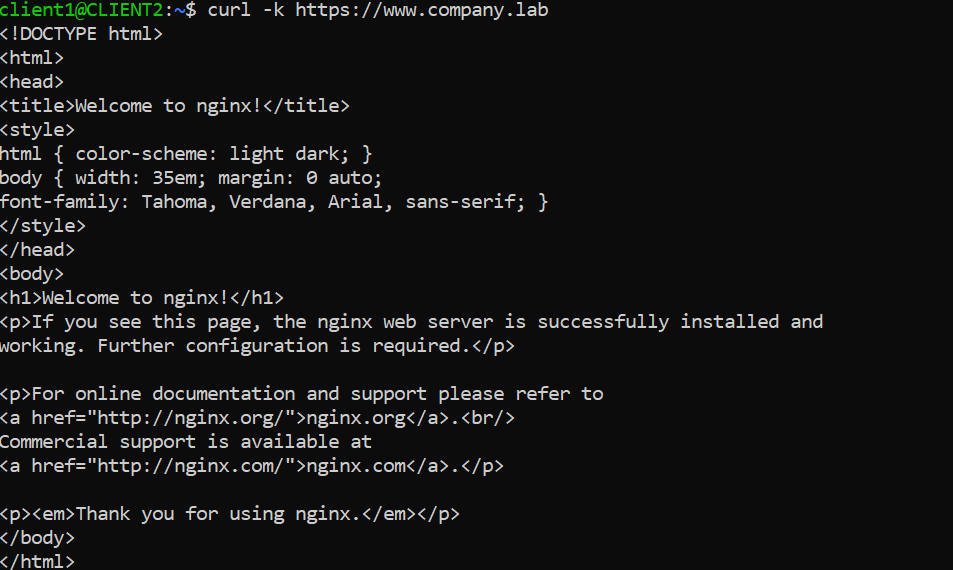
curl -k https://www.company.lab
curl http://www.company.lab
NOTE: The -k option tells curl to ignore the CA verification.
Phase 9 - Trust the Certificate Authority
Step 1 - Install the CA certificate
On DNS server:
scp /ca/ca.crt client@192.168.10.102:~
On client:
sudo cp ca.crt \
/usr/local/share/ca-certificates/company-lab-ca.crt

sudo update-ca-certificates
Phase 10 - Verify trust
Step 1 - Testing https request
On client:
curl https://www.company.lab
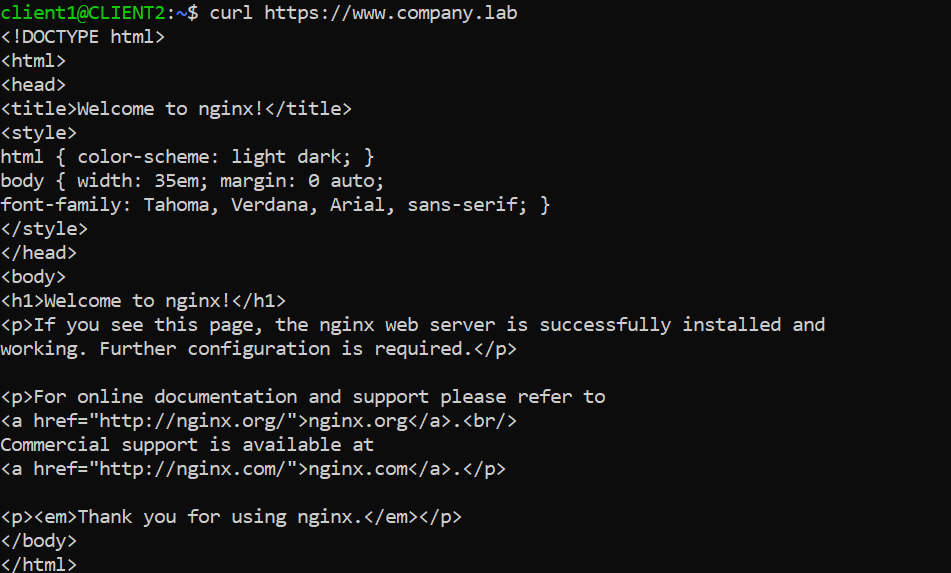
Step 2 - Inspect the TLS connection
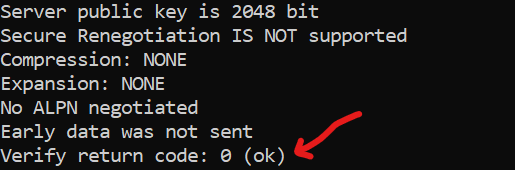
openssl s_client \
-connect www.company.lab:443 \
-servername www.company.lab